The Ultimate Guide to Preparing Your Vehicle for Off-Road Adventures
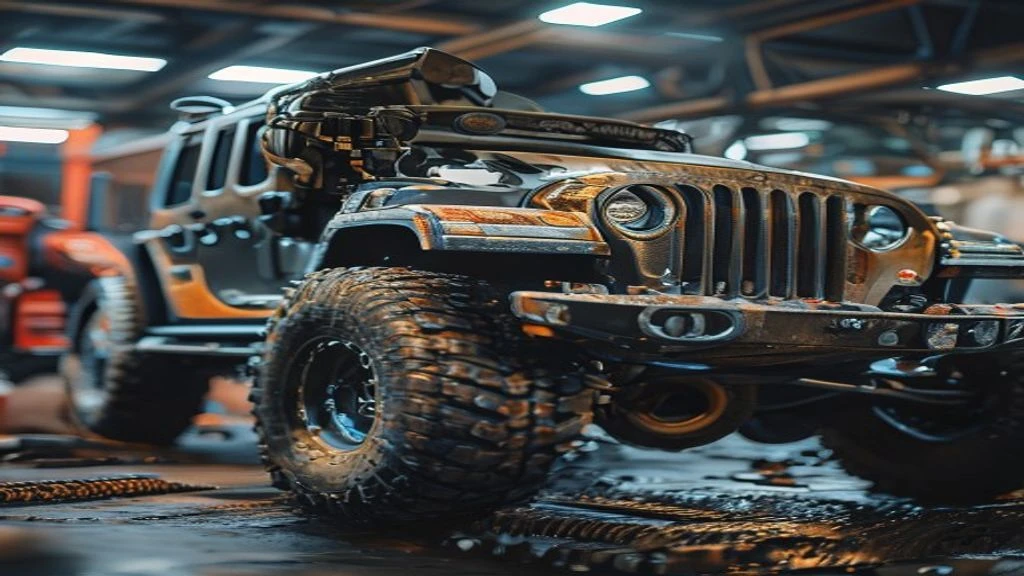
Table of Contents
- The Diagnostic / The Situation
- Technical Deep Dive
- Pre-Work Checklist
- Step-by-Step Guide
- Pro Tips & Common Mistakes
- Cost Analysis: DIY vs Mechanic
- Frequently Asked Questions
The Diagnostic / The Situation
Off-road driving can be an exhilarating experience, but it requires careful preparation to ensure your vehicle is up to the task. Whether you’re a seasoned off-roader or just starting out, it’s essential to understand the unique demands that off-road driving places on your vehicle. From rocky trails to sandy dunes, different terrain types require specific modifications and preparations to ensure your vehicle can handle the challenges. In this guide, we’ll focus on preparing your Jeep for off-road adventures, but the principles apply to any vehicle.
Symptoms or signs that your vehicle may not be ready for off-road driving include inadequate ground clearance, insufficient suspension travel, and lack of protection for vital components. If you’re planning to tackle challenging off-road terrain, it’s crucial to address these issues before heading out.
🔧 Related Guides:
Technical Deep Dive
The key to successful off-road driving lies in understanding how your vehicle’s systems work together to overcome obstacles. The suspension system, for example, plays a critical role in absorbing shock and maintaining traction. A well-designed suspension system will feature components such as coil springs, shock absorbers, and control arms that work together to provide a smooth ride and stable handling.
Common failure points in off-road driving include the plastic impeller in the water pump, which can shatter if the engine is subjected to excessive stress. The axle shafts and CV joints are also vulnerable to damage from rocks and other obstacles. To mitigate these risks, it’s essential to upgrade to heavy-duty components and protect vital systems with skid plates and other armor.
Pre-Work Checklist
| Task | Difficulty | Time | Cost | DIY vs Shop |
|---|---|---|---|---|
| Suspension Upgrade | 4/5 | 10 hours | $2,000 | DIY |
| Skid Plate Installation | 3/5 | 5 hours | $500 | DIY |
| Tire Upgrade | 2/5 | 2 hours | $1,000 | Shop |
Tools Required
- 10mm Socket
- Torque Wrench
- Welding Equipment (for skid plate installation)
- Jack and Jack Stands
- Air Compressor (for tire inflation)
Safety Warnings
When working on your vehicle, always wear protective gear such as gloves and safety glasses. Ensure the vehicle is securely supported by jack stands and apply the parking brake. Never work under a vehicle that is only supported by a jack.
Step-by-Step Guide
Upgrade Your Suspension
The suspension system is critical to off-road driving, as it provides the necessary travel and articulation to navigate challenging terrain. To upgrade your suspension, follow these steps:
Step 1: Remove the Old Suspension Components
Remove the coil springs, shock absorbers, and control arms. Take note of the location of any electrical or hydraulic lines that may be attached to the suspension components.
Step 2: Install the New Coil Springs
Install the new coil springs, ensuring they are properly seated and aligned. Use a spring compressor to compress the springs and make installation easier.
Step 3: Install the New Shock Absorbers
Install the new shock absorbers, ensuring they are properly aligned and seated. Use a torque wrench to tighten the shock absorber bolts to the specified torque.
Step 4: Install the New Control Arms
Install the new control arms, ensuring they are properly aligned and seated. Use a torque wrench to tighten the control arm bolts to the specified torque.
Install Skid Plates
Skid plates provide vital protection for your vehicle’s underside, shielding components such as the oil pan and transmission from damage. To install skid plates, follow these steps:
Step 1: Remove the Old Skid Plates (if applicable)
Remove the old skid plates, taking note of the location of any electrical or hydraulic lines that may be attached to the skid plates.
Step 2: Clean and Prepare the Area
Clean and prepare the area where the new skid plates will be installed. Ensure the surface is free of dirt and debris.
Step 3: Install the New Skid Plates
Install the new skid plates, ensuring they are properly aligned and seated. Use a torque wrench to tighten the skid plate bolts to the specified torque.
Upgrade Your Tires
Tires are a critical component of off-road driving, providing the necessary traction and grip to navigate challenging terrain. To upgrade your tires, follow these steps:
Step 1: Choose the Right Tires
Choose the right tires for your vehicle and the type of off-road driving you’ll be doing. Consider factors such as tread pattern, size, and load rating.
Step 2: Remove the Old Tires
Remove the old tires, taking note of the location of any wheel weights or balancing equipment.
Step 3: Install the New Tires
Install the new tires, ensuring they are properly seated and aligned. Use a torque wrench to tighten the lug nuts to the specified torque.
Pro Tips & Common Mistakes
Don’t underestimate the importance of proper preparation and maintenance when it comes to off-road driving. Common mistakes include failing to check the vehicle’s fluids and tire pressure before heading out, and neglecting to bring essential tools and equipment.
To avoid these mistakes, make sure to:
- Check your vehicle’s fluids and tire pressure before heading out
- Bring essential tools and equipment, such as a spare tire and jack
- Plan your route and research the terrain and weather conditions
- Bring a buddy or let someone know your itinerary
Cost Analysis: DIY vs Mechanic
The cost of preparing your vehicle for off-road driving can vary widely, depending on the extent of the modifications and the labor costs involved. Here’s a breakdown of the estimated costs:
- Suspension upgrade: $2,000 (DIY) vs $3,000 (mechanic)
- Skid plate installation: $500 (DIY) vs $1,000 (mechanic)
- Tire upgrade: $1,000 (DIY) vs $1,500 (mechanic)
Overall, DIY modifications can save you money, but may require more time and effort. Mechanic labor costs can add up quickly, but may be worth it for complex or time-consuming modifications.
Frequently Asked Questions
- What is the best suspension setup for off-road driving? The best suspension setup for off-road driving will depend on the type of terrain and the vehicle’s weight and size. A good starting point is to upgrade to a coil spring suspension with a lift kit and shock absorbers.
- How do I choose the right tires for off-road driving? Choose tires with a tread pattern and size that are suitable for the type of off-road driving you’ll be doing. Consider factors such as load rating, speed rating, and traction.
- What are the most common failure points in off-road driving? The most common failure points in off-road driving include the plastic impeller in the water pump, axle shafts, and CV joints.
- How often should I check my vehicle’s fluids and tire pressure before heading out? Check your vehicle’s fluids and tire pressure before every off-road trip, and at regular intervals (e.g. every 1,000 miles) to ensure they are at the recommended levels.
- What are some essential tools and equipment to bring on an off-road trip? Essential tools and equipment to bring on an off-road trip include a spare tire, jack, lug wrench, and first aid kit. Bring a buddy or let someone know your itinerary, and consider investing in a winch or other recovery equipment.
Reference: Technical analysis by Ben Foster (Trail Recovery Instructor) based on reports from Motor1 News.