The Ultimate Guide to Suspension Upgrades for Wider Vehicles: A Masterclass
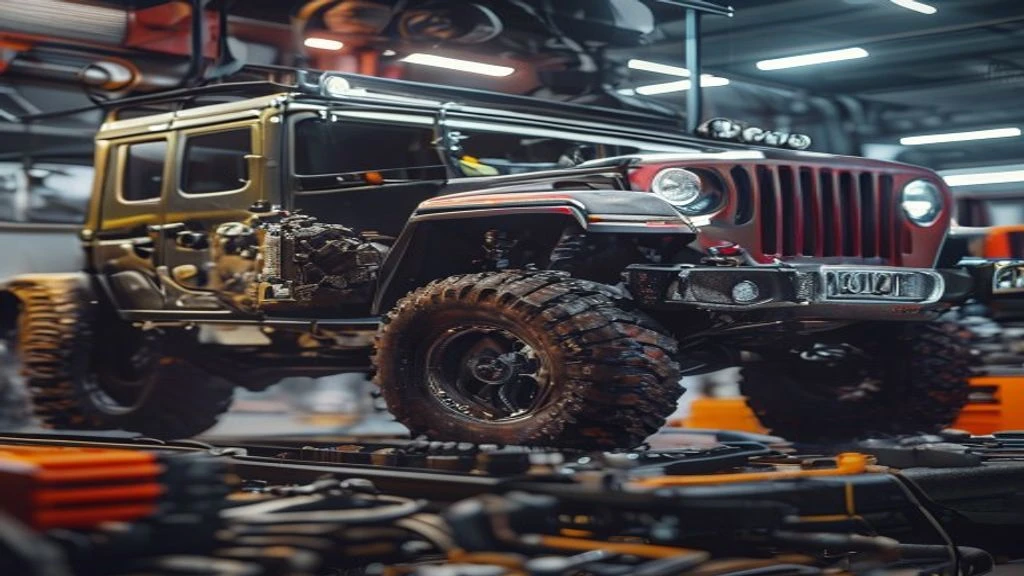
Table of Contents
- The Diagnostic / The Situation
- Technical Deep Dive
- Pre-Work Checklist
- Step-by-Step Guide
- Pro Tips & Common Mistakes
- Cost Analysis: DIY vs Mechanic
- Frequently Asked Questions
The Diagnostic / The Situation
The news of the new Hyundai Elantra N being even wider has sparked interest in the automotive community. As a suspension engineer, I can attest that a wider vehicle requires careful consideration of its suspension system to ensure optimal performance and stability. A wider vehicle can put additional stress on the suspension components, leading to premature wear and potentially compromising the safety of the vehicle. In this guide, we will delve into the technical aspects of suspension upgrades for wider vehicles.
Symptoms or signs to look for in a vehicle that may require suspension upgrades include uneven tire wear, vibration, or instability while driving. If you’re planning to upgrade your vehicle’s width, either by installing wider tires or modifying the body, it’s essential to assess your suspension system to ensure it can handle the added stress.
🔧 Related Guides:
Technical Deep Dive
The suspension system of a vehicle is responsible for absorbing bumps, maintaining tire contact with the road, and providing stability. The main components of a suspension system include the springs, shock absorbers, and control arms. When upgrading a vehicle’s width, it’s crucial to consider how these components will be affected.
Common failure points in a suspension system include the ball joints, bushings, and coil springs. The ball joints connect the control arms to the steering knuckles, while the bushings provide a cushioning effect between the suspension components. Coil springs are responsible for supporting the weight of the vehicle and maintaining ride height. When a vehicle is widened, these components may need to be upgraded or replaced to ensure they can handle the added stress.
Pre-Work Checklist
At a Glance Table
| Difficulty | Time | Cost | DIY vs Shop |
|---|---|---|---|
| 4/5 | 10-15 hours | $1,500 - $3,000 | DIY (with experience) |
Tools Required
- 10mm Socket
- 12mm Socket
- 14mm Socket
- Torque Wrench
- Spring Compressor
- Ball Joint Separator
- Bushing Press
Safety Warnings
When working with suspension components, it’s essential to take necessary safety precautions to avoid injury. Always wear protective gear, including gloves and safety glasses. Ensure the vehicle is securely supported by jack stands and never work under a vehicle that is only supported by a jack.
Step-by-Step Guide
Upgrading the Coil Springs
The coil springs are a critical component of the suspension system, and upgrading them can help improve the vehicle’s stability and ride height. To upgrade the coil springs, follow these steps:
Measuring the Current Springs
Measure the current coil springs to determine their rate and length. This information will be used to select the correct replacement springs.
Selecting the Replacement Springs
Choose replacement springs that have a higher rate and are designed for wider vehicles. Ensure the new springs are compatible with your vehicle’s make and model.
Installing the New Springs
Use a spring compressor to compress the new springs and install them onto the vehicle. Ensure the springs are properly seated and the retaining clips are securely fastened.
Upgrading the Control Arms
The control arms are responsible for maintaining the vehicle’s alignment and stability. To upgrade the control arms, follow these steps:
Inspecting the Current Control Arms
Inspect the current control arms for any signs of wear or damage. Check the bushings and ball joints for any play or looseness.
Selecting the Replacement Control Arms
Choose replacement control arms that are designed for wider vehicles and have upgraded bushings and ball joints. Ensure the new control arms are compatible with your vehicle’s make and model.
Installing the New Control Arms
Use a ball joint separator to remove the old ball joints and install the new control arms. Ensure the new control arms are properly aligned and the bushings are securely fastened.
Upgrading the Shock Absorbers
The shock absorbers are responsible for absorbing bumps and maintaining the vehicle’s stability. To upgrade the shock absorbers, follow these steps:
Inspecting the Current Shock Absorbers
Inspect the current shock absorbers for any signs of wear or damage. Check the seals and bushings for any leaks or play.
Selecting the Replacement Shock Absorbers
Choose replacement shock absorbers that are designed for wider vehicles and have upgraded valving and seals. Ensure the new shock absorbers are compatible with your vehicle’s make and model.
Installing the New Shock Absorbers
Use a torque wrench to remove the old shock absorbers and install the new ones. Ensure the new shock absorbers are properly aligned and the bushings are securely fastened.
Pro Tips & Common Mistakes
When upgrading a vehicle’s suspension system, it’s essential to avoid common mistakes that can compromise the vehicle’s stability and safety. Some common mistakes include:
- Not properly aligning the new suspension components
- Not tightening the bolts and fasteners to the correct torque spec
- Not testing the vehicle’s suspension system after upgrading
Some pro tips to keep in mind include:
- Always follow the manufacturer’s instructions when upgrading suspension components
- Use a torque wrench to ensure the bolts and fasteners are tightened to the correct spec
- Test the vehicle’s suspension system after upgrading to ensure it’s functioning properly
Cost Analysis: DIY vs Mechanic
The cost of upgrading a vehicle’s suspension system can vary depending on the components and labor involved. On average, the cost of upgrading the coil springs, control arms, and shock absorbers can range from $1,500 to $3,000. If you choose to hire a mechanic to perform the upgrades, the labor cost can add an additional $1,000 to $2,000 to the total cost.
Frequently Asked Questions
- Q: What are the benefits of upgrading my vehicle’s suspension system? A: Upgrading your vehicle’s suspension system can improve its stability, ride height, and overall performance.
- Q: How do I know if my vehicle’s suspension system needs to be upgraded? A: If you notice any signs of wear or damage, such as uneven tire wear or vibration, it may be necessary to upgrade your vehicle’s suspension system.
- Q: Can I upgrade my vehicle’s suspension system myself, or do I need to hire a mechanic? A: If you have experience working with suspension components, you can upgrade your vehicle’s suspension system yourself. However, if you’re not comfortable with the process, it’s recommended to hire a mechanic.
- Q: What are the most critical components to upgrade in a suspension system? A: The coil springs, control arms, and shock absorbers are the most critical components to upgrade in a suspension system.
- Q: How long does it take to upgrade a vehicle’s suspension system? A: The time it takes to upgrade a vehicle’s suspension system can vary depending on the components and labor involved. On average, it can take 10-15 hours to complete the upgrades.
Reference: Technical analysis by Marcus Reynolds (Suspension Engineer) based on reports from Motor1 News.